M3 · Training and support

An Easy to Use Jewelry Laser Welder, From the First Day on the Bench

Most people looking for an easy to use jewelry laser welder have never run a laser. They run a repair bench, a goldsmith’s bench or a personalization studio, and they arrive with three questions. Three questions, three answers in full.

Q1 · INSTALLQ2 · FIRST WELDQ3 · WRONG DAY
Q1 / 03

What has to change in the shop before it can run?

ONE CORNERPending photo · one corner of the bench
Nothing gets installed

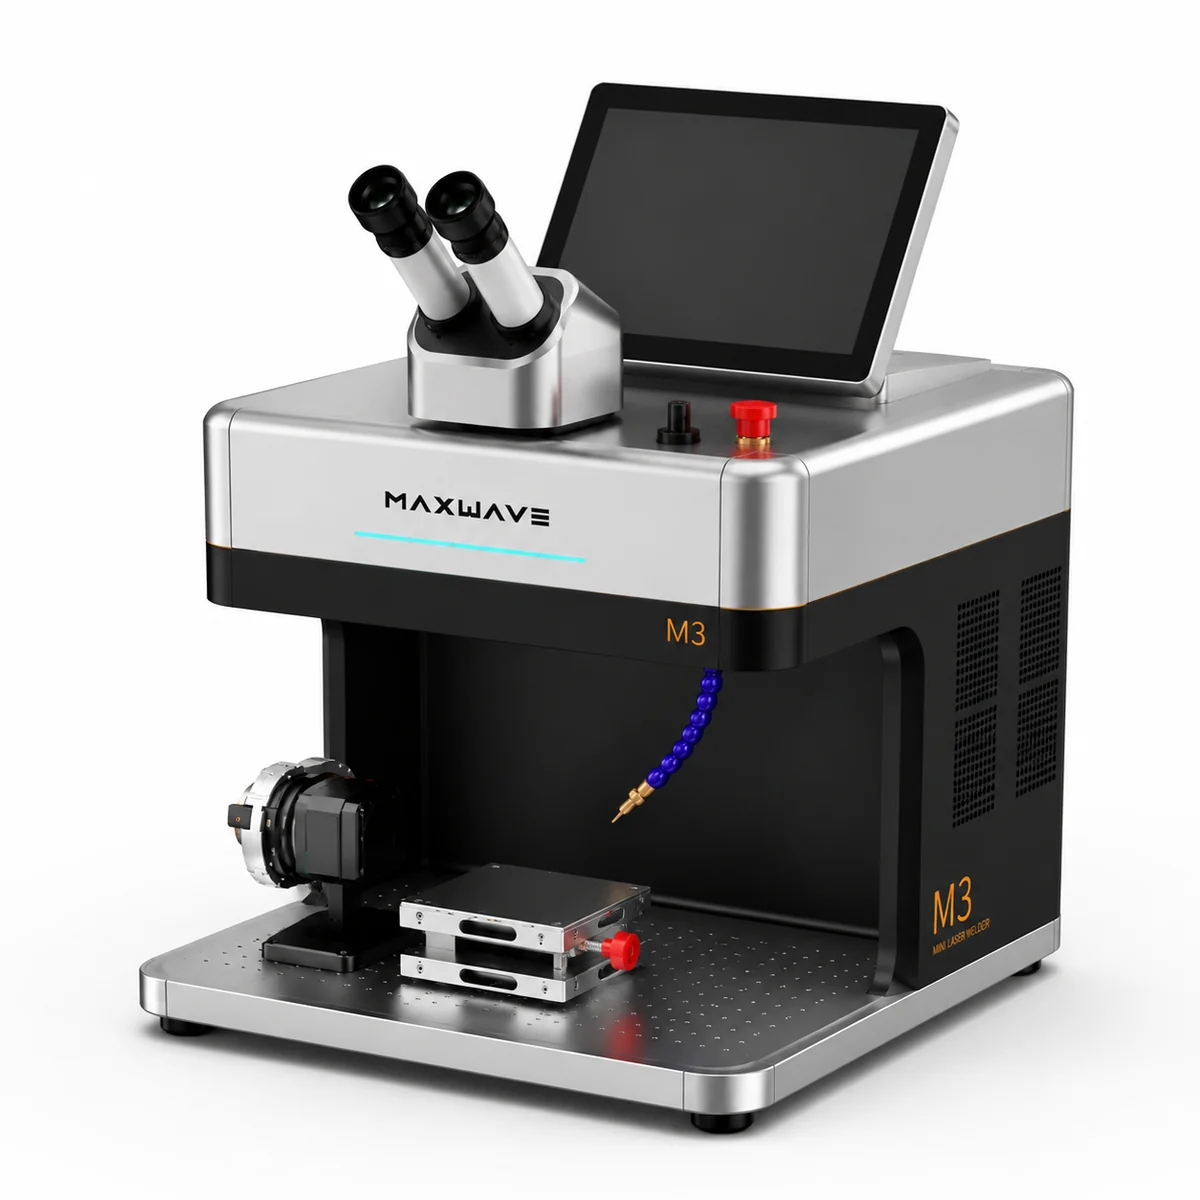
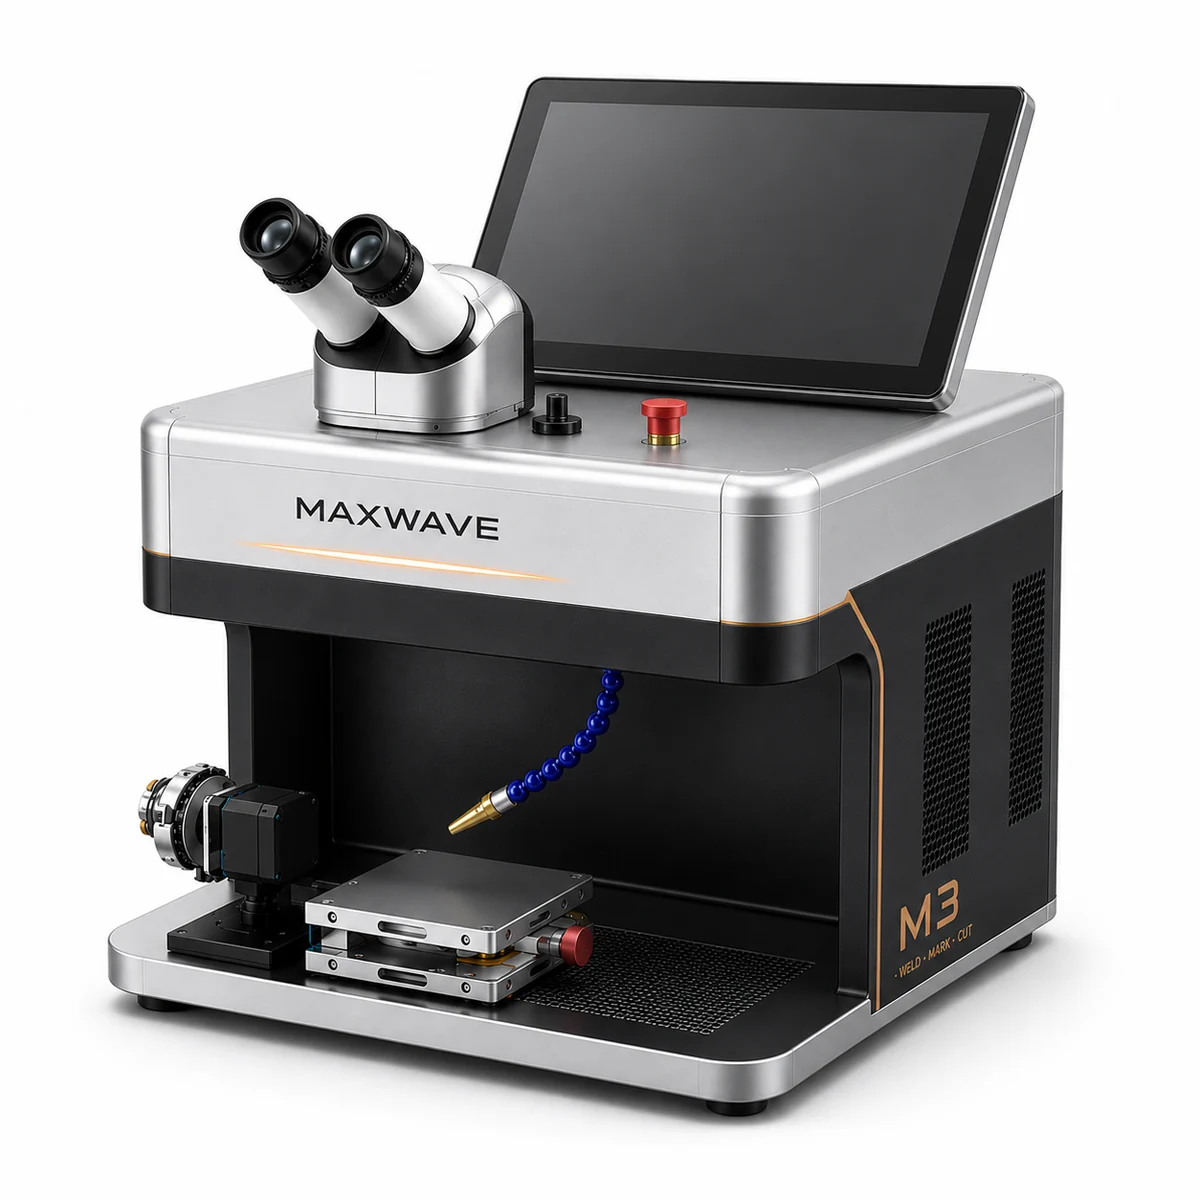
Air cooled with no external chiller. A single phase supply. A 10 inch Android touch screen instead of a separate computer. It stands on a corner of the bench already there.

Question one in full
Q2 / 03

Can I weld a real piece myself in the first week?

FIRST SHOT / 10XPending photo · preset, then first shot
One touch, then one shot

A material dial loads a preset at one touch. A foot pedal fires it, red light positions the marking side, and a 10X binocular microscope reads the first shot before the real piece goes under the head.

Question two in full
Q3 / 03

What happens on the day a result comes out wrong?

ONE PARTPending photo · video on the screen
The answer is already at the bench

Operating and maintenance videos on the machine’s own screen. One routine consumable, changed at the bench. A self check order that names which setting to move first.

Question three in full
  • Air cooled, no chiller
  • 10 inch Android screen
  • One touch presets
  • One routine consumable

Q1 · What has to change

Installing an Easy to Use Jewelry Laser Welder

Before a laser can be easy to run, it has to be possible to install. What makes one hard to live with in a jewelry shop is rarely the welding. It is the equipment that arrives around the welding.

Absent
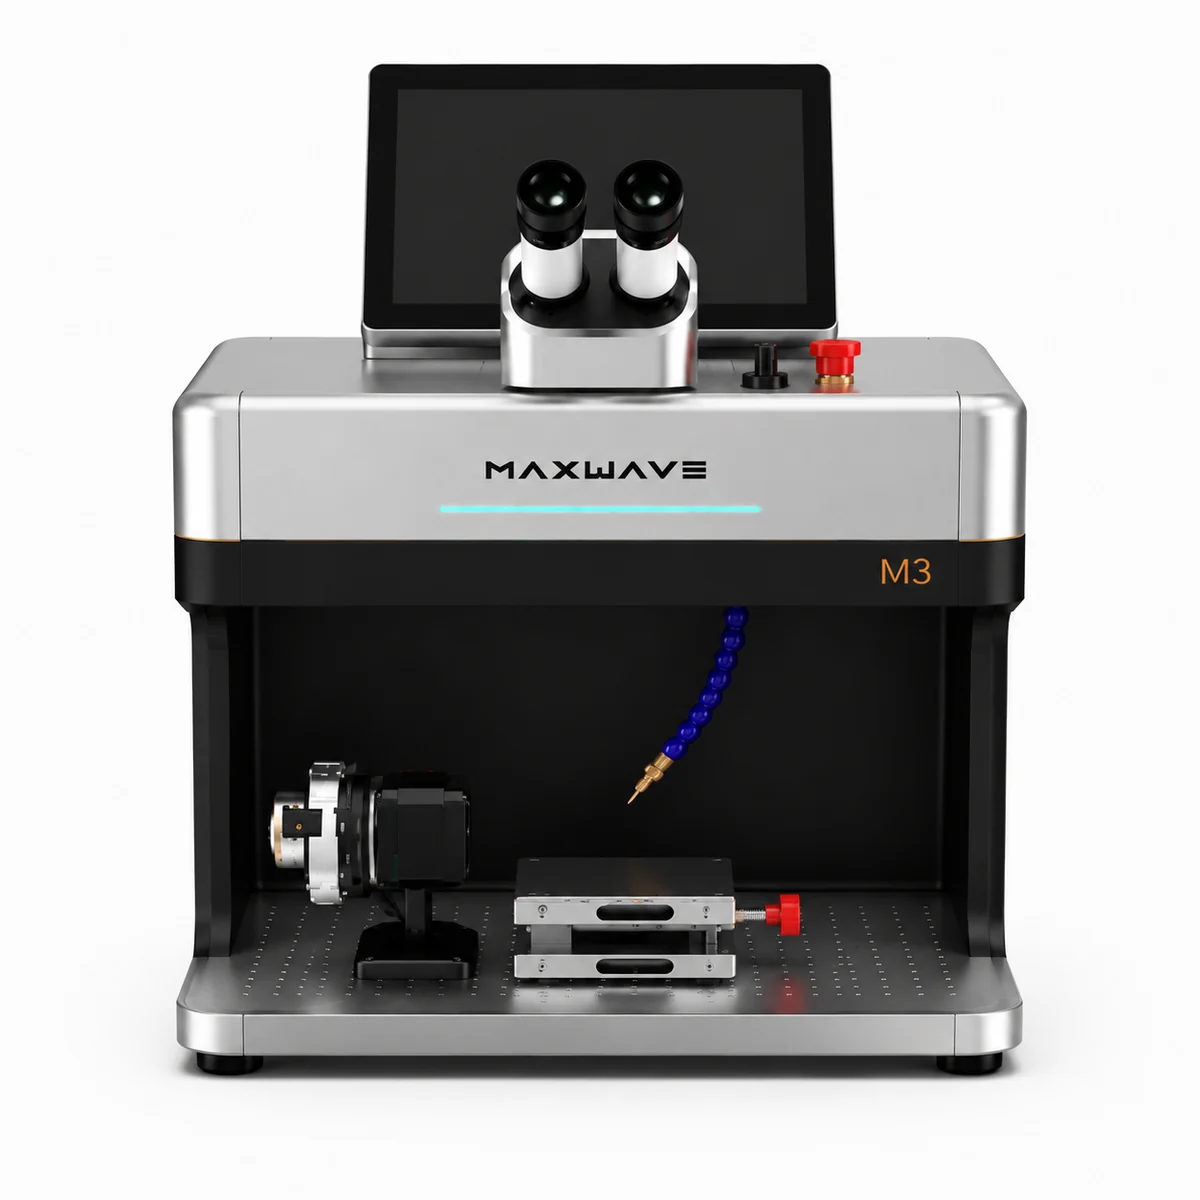
An easy to use jewelry laser welder with no chiller beside it: the whole M3 is this one cabinet

No chiller beside it

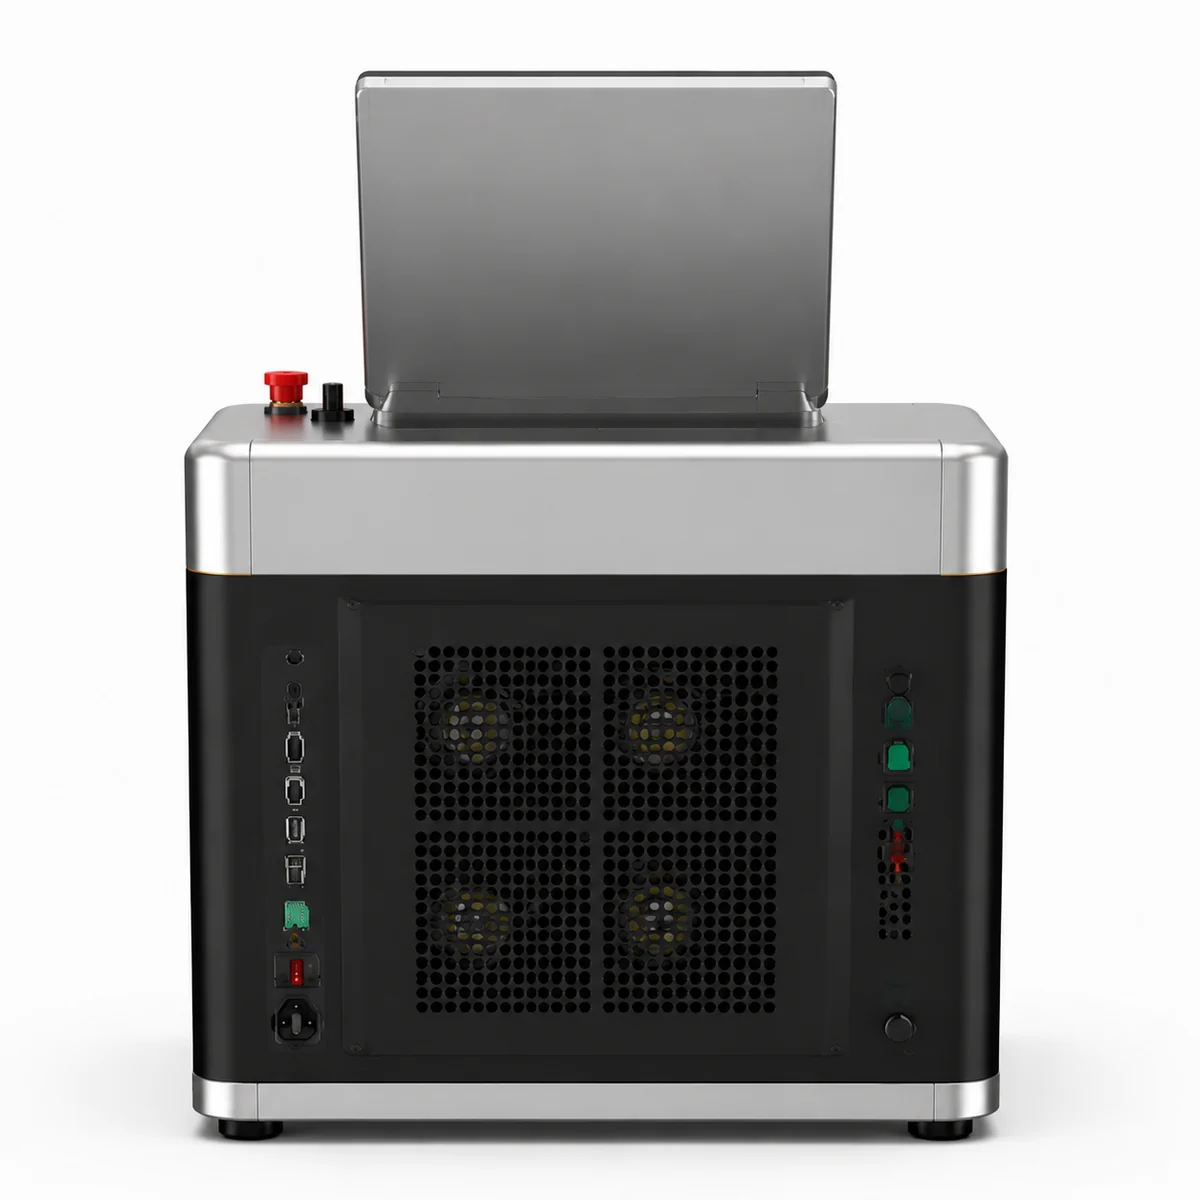
The M3 is air cooled. No external chiller, no water to fill, no circuit to bleed, no hoses across the floor, nothing to drain before a cold weekend. The water side of ownership is absent, not simplified, and the back of the cabinet is a vented panel.

Absent
The 10 inch Android touch screen that replaces a separate computer on the M3

No separate computer

The 10 inch 1280P capacitive touch screen runs Android, and both interfaces, welding and marking, live on it. No laptop connects to change a setting. Files reach the machine over Bluetooth, Wi-Fi or USB.

Absent
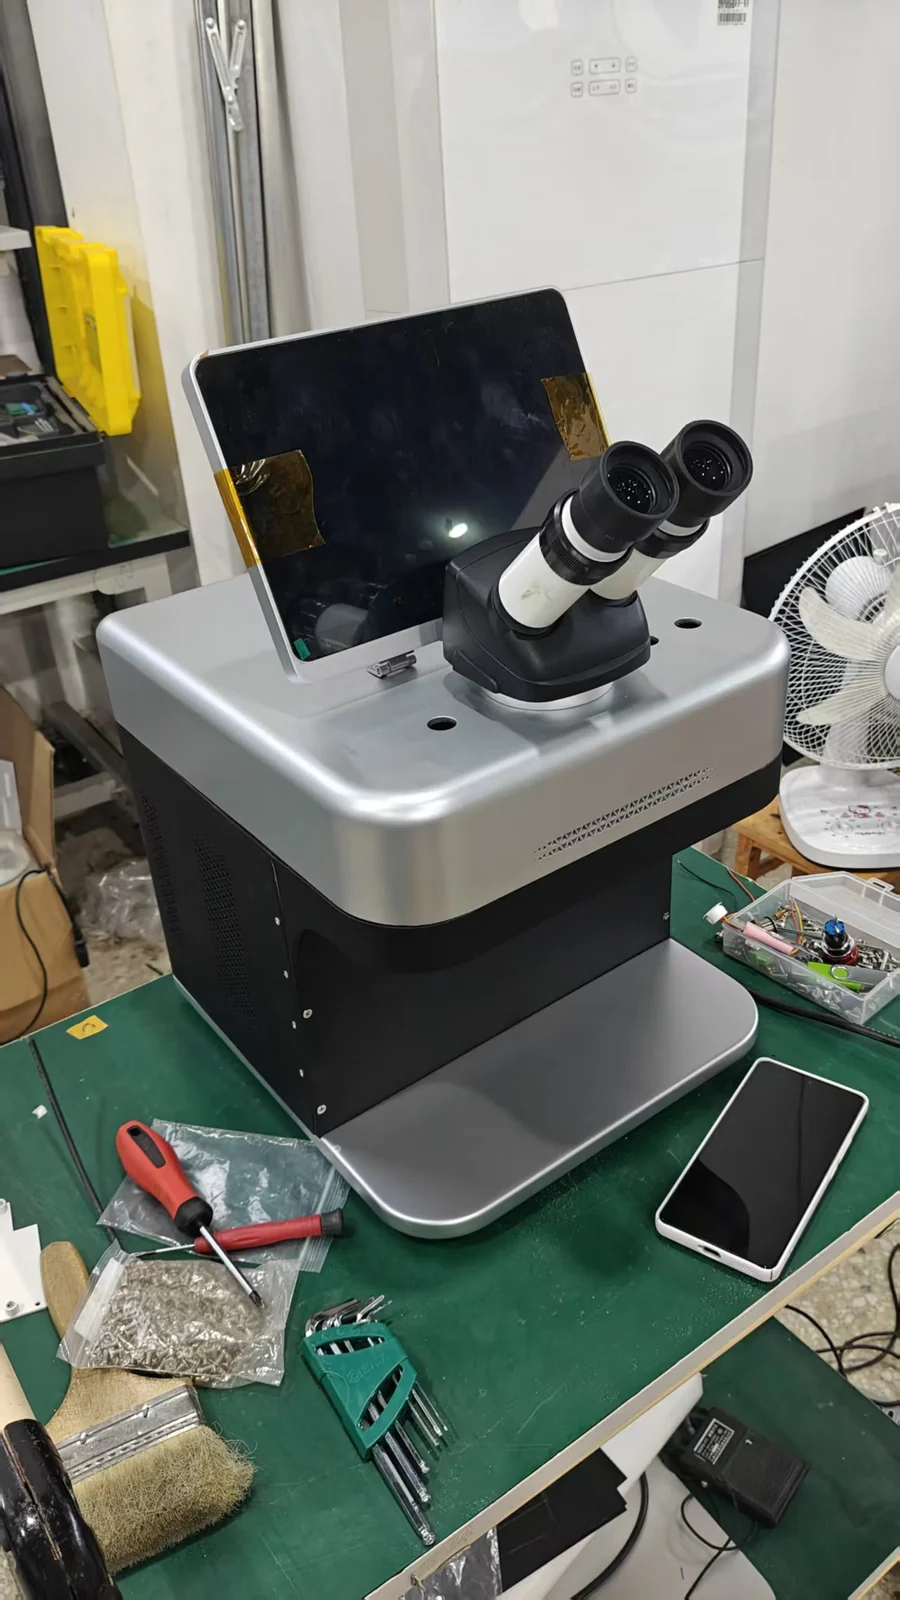
The M3 on a workshop bench with a phone beside it for scale

No room to clear

It takes a corner of an existing bench, and one person moves it when the bench gets rearranged. The phone beside it in the photograph is the honest scale.

Needed from you SINGLE PHASEPending photo · your socket

One thing: your supply

Built around single phase AC 220 V at 50 Hz, drawing 2 kW in total. Send the single phase voltage and frequency at the socket where it will stand, plus the plug standard in your country. The answer comes back against that socket, not an assumption.

The welding interface of an easy to use jewelry laser welder, where the operating videos also live
The welding interface. The videos sit one touch away from it.
Pending photo · video at the machine SAME SCREEN / SAME LESSONPending photo · the next operator
Denmark, 2025

This screen exists because of a customer. A buyer in Denmark reported that a blurred low resolution screen was tiring their eyes across a day at the bench. The Android screen and the imported camera on this machine came out of that complaint.

The whole machine on the home page

Q3 · Where the manual lives

The Manual Inside the Screen

Operating and maintenance videos are inside the M3, on the same 10 inch screen that runs it. The useful part is not the videos. It is where they are.

  • On the screen that runs the machine

    An unsure operator is standing at the machine with a piece in hand. The interface, the microscope, the dial and the instruction sit on one surface, within reach at that moment.

    Nothing depends on a printed manual written for a different model, a good connection that morning, a time zone lining up, or anybody at the factory being awake.

  • The same lesson for every operator

    The second and third operators learn exactly the way the first did, from the identical screen. Nobody in the shop has to become the person who remembers how it works.

  • Interface languages

    English and Chinese are on the machine. Other languages are built on request.

    EnglishChineseYours, on request
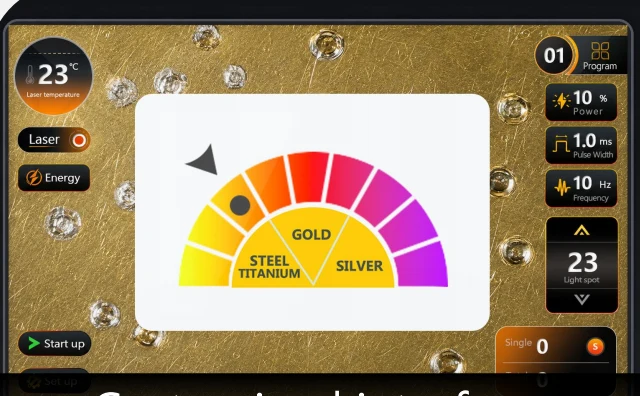
GOLDSTEELTITANIUMSILVERSchematic · four positions on the dial

4

positions on the dial

3

named controls after the preset
The 10X binocular microscope of an easy to use jewelry laser welder, where the first shot is read
SCRAP / SHOT, READ, ADJUSTPending photo · first shots on scrap

Q2 · What there is to learn

Easy to Use Jewelry Laser Welder Settings

What makes a laser hard for a beginner is the size of the thing to be learned. On some machines that is a library of stored recipes, searched before it can be used. Here it is one dial and one shot.

  • One touch loads the preset

    Four positions on the screen: GOLD, STEEL, TITANIUM and SILVER. One touch loads the preset behind the position picked, and the machine is ready to fire from the pedal. That is everything a new operator needs to start.

  • Three controls with names, not codes

    Each one moves the result in one direction, which is what makes three a learnable amount.

    Spot size · electricPulse widthFrequency
  • Nearest position, then the first shot

    Platinum, copper and aluminium are all weldable on the M3 and none has a position of its own. Start from the nearest position and correct on the first shot, read under the 10X binocular microscope before the real piece goes under the head.

    The skill on this machine is reading a result, not memorising numbers.

Q2 · The handover

An Easy to Use Jewelry Laser Welder Handover

The real test is not the owner running it. It is the owner handing it to somebody else without standing behind them. Most repair shops have exactly one person for the difficult work, and every job queues behind them. Here the handover has a shape, in six steps.

  1. 01

    Start on the screen, not the microscope

    The camera view and the eyepiece view are the same view, and the screen carries it in HD at a size two people read together. The trainer sees what the trainee sees, and corrects a placement before the pedal goes down instead of after.

  2. 02

    Videos in the machine, at the machine

    The trainee works through the on board videos standing at the M3, with the trainer free to be elsewhere in the shop.

  3. 03

    The dial, untouched

    GOLD, STEEL, TITANIUM or SILVER, one touch, nothing adjusted on the first day. An untouched preset is a known state, and a known state is what a beginner needs to learn what the machine does at rest.

  4. 04

    Scrap until three come out alike

    Offcuts of the same alloy and section as the real work, never customer pieces, until the trial shot comes out the same way three times running. That first pulse read under the microscope is the one habit carried into every job afterwards.

  5. 05

    A job type, not a job queue

    The natural first set is chain and jump ring repair, bead re-seating, porosity filling and finding work, where the joint is big enough to place a melt point accurately from the screen. The bench owner keeps stone-set work, hollow sections and anything coming back from a previous repair.

  6. 06

    Acceptance on the same screen

    The trainer inspects the joint under the camera at the end of the run instead of taking the trainee’s word. The record of what was used, which preset, which spot, which pulse settings, stays in the shop, so the next person starts from a written sheet.

What this changes is the queue.

A second person on the routine half of the repair tray releases the bench owner for the work only they can do. None of it needed a course or a visiting engineer. It needed a shared view and a starting state one touch away.

ONE VIEW / TWO READERSPending photo · one view, two readers SETTINGSPending photo · the written starting point

Q1 · The day it lands

The Crate and the Receiving Check

Opening the crate is the first thing anyone does with this machine. Three things travel with it, and each has a job on the day.

Pending photo · the signed checklist Read it against the machine

Quality Inspection Checklist, signed

Every power supply, every laser source and every assembled machine is inspected individually at the last of four production stations. The checklist names the unit standing in front of you, not the model in general.

Pending photo · the pre-dispatch record Left as, arrived as

Pre-dispatch photographs and video

The machine is photographed and filmed before the crate closes, so the condition it left in and the condition it arrived in are both on record.

Pending photo · the cleaner in the crate In the same crate

A mini ultrasonic jewelry cleaner

For the step that follows almost every repair. It ships with the machine, not as a later order.

500 × 520 × 540 MM / 45 KGPending photo · the crate opened

No assembly between the crate and the first shot

Stand it on the bench and connect it. No chiller to plumb in and no computer to pair, so the gap between opening the crate and firing a trial shot on scrap is short.

Packed 500 × 520 × 540 mm45 kgScreen in a metal caseHigh strength bubble foam
The four stations behind the checklist

Q1 + Q3 · Two documents

Installation Drawings and Repair Guidance

Two documents decide how much of this machine you are allowed to understand. Both are handed over, not held back.

Ask for both before you order, not after.

Request the drawings
DocumentThe day it is forWhat it settles
Installation drawingsThe day it landsHow the machine stands, what it connects to, where the vented panel needs clearance, where power comes in and gets isolated. They are also a check on the seller: drawings showing how to open a machine and what is inside it are not something a reseller holds.
Repair guidanceThe day something needs attentionWhat is owner level work on this machine and what is not. That single distinction decides whether a problem costs an afternoon or a week. Changing a protective lens is on the near side of it. Opening a source is not.
CLEARANCEPending scan · installation drawing Pending scan · repair guidance page

Both arrive as a matter of course, not withheld to protect a service revenue stream. A machine you are allowed to read about keeps running in a country with no engineer of ours in it.

Q3 · The one consumable

One Consumable: the Protective Lens

FOCUSING OPTICSPROTECTIVE LENSSPATTER + VAPOURTHE WORKSchematic · spatter lands here, not on the optics
1
part consumed in normal running

It sits between the work and the optics that focus the beam, as the cheap thing that takes the damage. Welding throws spatter and metal vapour upward off the joint, and it lands on a flat piece of glass instead of the focusing optics. Sacrificing that glass is the design.

Check the lens before any parameter is touched.

Telling that it needs changing

Read your own results, not the calendar. Same preset, same alloy, same section, same settings, and the weld is quietly not what it was: the pool a little smaller, a second pass where one used to do.

A fogged or pitted lens attenuates and scatters the beam before it reaches the work, so a good machine looks like a failing one. Heavy, spattery work uses lenses faster than occasional fine repairs, so change it by the work and by what you see in good light:

HazeSpatter pockingA burned spot
Pending photo · haze and pocking

Changing it is bench work

  1. Machine off and isolated.
  2. Follow the procedure in the repair guidance from the crate. No phone call needed.
  3. Fit the new lens. Nothing is pumped out, purged or recalibrated afterwards.
  4. Fire a trial shot on the same scrap, with the preset that was giving trouble. It comes back to what it was.
Pending photo · the part itself

Why it sits outside the warranty

It is a consumable, the way a saw blade is, and the exclusion is stated here instead of discovered later. What matters is the length of the list it is on.

  • This machineOne entry on the list.
  • A lamp-pumped machine of the same classSeveral parts, on different cycles.

One entry is why a year of ownership contains no scheduled service event at all.

Consumable list: one entry

Q3 · What is left to do

Jewelry Laser Welder Maintenance After Air Cooling

Most routine maintenance on a jewelry laser is water maintenance. Air cooling removes that list instead of shortening it. None of it is a reduced burden here. It is absent.

Absent with the water

  • Coolant to top up
  • A circuit to descale
  • A tank to watch
  • A water filter to change
  • A pump to service
  • Draining before a cold closure
The vented rear panel of an easy to use jewelry laser welder: the whole of its cooling system
The back of the cabinet: a vented panel, and no water connection anywhere on it.

What is left

  • Keep the vented panel clearThe machine has to move air, so nothing gets stacked against the back.
  • Keep the work area tidyA jewelry bench already is.
  • Watch the protective lensBy the result and by the glass, as set out above.
  • Run it inside its environment range0 to 40 °C, humidity up to 80%.

>100,000 h

Rated life of the laser sources. Read the noun in that figure: it rates the source. It is neither a machine life nor a term of cover. It does say the source is not a scheduled replacement item the way a lamp is.

Pending photo · clear space behind the panel

Environment and supply figures in full

Q3 · The day it comes out wrong

Jewelry Laser Welder Troubleshooting: The Self Check Order

Almost everything called troubleshooting on a jewelry laser is not a fault. It is a result that came out wrong: a weld that did not take, a mark too faint, an outline that did not go through the sheet.

The machine is working. Something between the file, the fixture, the settings and the glass is not. The order is the same every time, and every step is done at the bench.

  1. 01

    Where the beam landsSetup layer

    Confirm the piece is at the working position and in focus: the microscope on the welding side, the red light outline on the marking and cutting side. A piece that has shifted, sagged or sits off focus produces exactly the symptoms people blame on power.

  2. 02

    How the piece is heldSetup layer

    Two surfaces that are not touching cannot be joined by energy alone, and a heavy section against a heat sink behaves differently from one held in air. On thin sheet, flatness through the cut is the fixture’s job.

  3. 03

    The dialPreset layer

    Confirm the loaded position is the nearest one to the alloy actually in your hand. Platinum, copper and aluminium have no position of their own and are corrected by eye from the nearest.

  4. 04

    One control, one directionParameter layer

    More penetration is a different control from how gently the energy is delivered, and a wider spot spreads the same energy over more area. Change one thing, fire on scrap, read it under the microscope, then change the next. Two changes at once tell you nothing.

  5. 05

    The protective lensConsumable layer

    Inspect it in good light. Replace it if it is hazed, pocked or burned, then repeat the trial shot.

  6. 06

    Still wrong? Stop, and send that.

    The order has gathered exactly what makes a useful message: the metal, the section, the preset, the three settings, what you changed and what it did.

    Send the Six Lines
IN FOCUSPending photo · in focus first ONE CONTROL / ONE DIRECTIONPending photo · one change per shot

Q3 · Who owns what

Your Layers and Ours

The self check order is also a map of who owns what, which is the thing most people want to know when a machine misbehaves.

Yours · at the bench

Three layers

  • Setup and holdingWhere most wrong results live.
  • Presets and parametersCorrected by the trial shot, which is the skill the machine is built around.
  • Consumable levelThe protective lens, changed at the bench with the guidance from the crate.
HOLDING / SETTINGS / LENSPending photo · everything within reach Back to the self check order

Ours · component level

One layer

The laser power supply and the QCW fiber source are designed and built in house, not bought as modules and integrated. A question that turns out to be electrical or optical reaches the people who drew it, instead of stopping at the edge of what an integrator knows.

  • Laser power supplyDrawn and built at the first station.
  • QCW fiber sourceDrawn and built at the second station.
POWER SUPPLYQCW SOURCEPending photo · supply and source stations How support is organised at the factory

If the order ran out, that is the boundary.

It is not a judgement you make alone. Nothing on this page asks you to open an assembly, and nothing asks you to diagnose a source.

Q3 · The cover

A Jewelry Laser Welder Warranty in Three Events

Two years on the laser source, one year on the machine, lenses and consumable parts excluded. The same three lines sit on the specification and the configuration sheet. Here they are read against the three kinds of event a working shop actually sees.

The M3 cabinet, screen and observation system, the assembled machine covered for one year
Screen, observation system, cabinet: the machine around the two components.
EventWhat it is in a shopCover
ConsumptionThe protective lens, and in normal running only the protective lens. It is meant to be used up, it is cheap, and it is bench work. With one entry on the list, this whole category is nearly empty.Excluded by design
A componentThe power stage and the source carry the serious current and the serious optical load in this cabinet. They are also the two things built in house, which is why the source carries the longer term.2 years on the laser source
The machine around themThe screen, the observation system, the cabinet and everything assembled at the third station.1 year on the machine

No lifetime warranty is offered, and none is claimed.

A term that long on a machine with consumable optics and years of daily use would not mean anything. The excluded parts would surface at the moment the cover was needed.

Pending scan · the three lines on the sheet

The manual is on board. The consumable is one part. The document that says what you may open is in the crate.

Ask for the Drawings

Q2 · Before you own it

A Welding Test as the First Lesson

The fastest way to find out whether you can run this machine is to watch it run your work before you own it. Send one piece: the repair you do most often, a blank in the alloy you find difficult, or an offcut of the sheet you want to cut.

Your first parameter sheet.

On the day the machine arrives, the operator has a known good starting point for the job the shop does most, in its own metal, instead of a blank dial and an afternoon of guessing.

The limits come back too

Maximum weldable section, smallest part and sheet thickness are not published figures, because one number would be wrong for half the pieces quoted against it. A piece beyond what an M3 will do comes back saying so, along with what could not be achieved on it.

Returned with the piece

What comes back, written down

  • Which source ran itQCW or MOPA
  • The spotas set
  • The pulse settingswidth + frequency
  • The preset useddial position
  • The accessory on the machineif any
Send One Piece
Pending photo · piece and sheet, returned Pending scan · first parameter sheet

All three · blank on purpose

Four Figures Left Off This Page

Some of what a support page usually promises is missing from this one deliberately. These are the four, with the reason and what is stated in their place.

Schematic · fields left blank Who stands behind the answers
Not quotedWhy it is blankStated instead
Training durationNo course length, no session count, no claim about minutes to get started. That figure depends entirely on who is standing at the bench and what they already do for a living.What is in the machine and what is in the crate. Both are checkable.
Response time, an engineer at your door, spare part deliveryThe M3 is sold direct and internationally, and each of those would be a different figure in every country.A machine that needs the factory less: the manual on board, one consumable you fit yourself, and the document that says what you may open.
Failure rates, a fault code table, a common faults listAll three would have to be invented, and a jewelry shop would plan around them.The self check order, and a message format that gets a real answer.
Retrofit of a major assemblySome changes can be retrofitted to a machine already on a bench, and some cannot.Which one, said plainly when asked.

Two ways to start

Send a Piece and a Question

Ask for the installation drawings and the repair guidance, and read what running this machine involves before buying it. Or send one piece of your own work and get it back with the settings written down.

  • Installation drawings, before you order
  • Repair guidance: what is owner level
  • One piece back with its parameter sheet
  • An answer against your own socket

Already running an M3 and stuck after the self check order? Paste the six lines into the form.